Sprite Byte Tutorials Lesson Two: All About Masks
by Alyce Watson http://alycesrestaurant.com/-
Table of Contents
Why do we need a mask?
Bitmaps are rectangular images, and simply copying them to the background doesn't make for a realistic scene. Sprite graphics allow us to place an image on a background so that it appears to be part of the picture. Look at the two dragon images below. One is copied onto the background just as it appears, surrounded by black. The second dragon looks as if it is flying over the landscape.This effect is achieved by placing a mask on the background first, then layering the sprite image on top of it. The nuts and bolts stuff that goes on behind the scenes in Liberty BASIC makes use of some drawing rules that combine the pixels of an image with the background in special ways that enable us to create this realistic effect.
The Sprite Image
A sprite image begins with the figure itself, surrounded by all black. True black is color RGB 0, 0, 0. Here's a dragon image surrounded by black: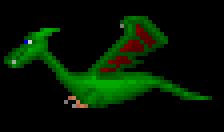
How to create a mask in your favorite paint program.
To create a mask in MS Paint or your favorite paint program, first make a copy of the image and open it in Paint. (You'll need the original image to remain unchanged, so use a copy to create the mask.) Use the flood fill tool and fill the area surrounding the image with white. True white must be used and it is RGB 255, 255, 255. The starting point for the dragon mask looks like this: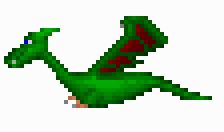
After you've filled the background with white, use the pen tool (or flood fill) to color all other parts of the image black. True black must be used, and that is RGB 0, 0, 0. Here, we've started to change the colored pixels to black.
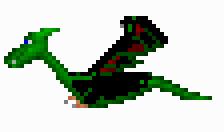
We must color the entire sprite part of the image black. The completed mask for the dragon looks like this:
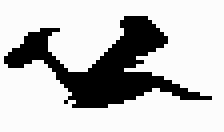
Adding a mask to the sprite image.
It's time to add the mask to the sprite. Open the original sprite image. If you are using MS Paint, open another instance of Paint and place them side by side on the desktop. Some paint programs allow you to open multiple images at the same time. You'll now have the sprite open in one window and the mask in another window.Alter the size of the sprite image so that it is the same width, but twice as high as the original. If the original image is 100 pixels wide and 75 pixels high, the new image should be 100 pixels wide (that value doesn't change) and 150 pixels high (75 X 2 = 150). Move the sprite image to the bottom of this larger image. The dragon image now looks like this:
Go to the window containing the mask you've created and copy it to the clipboard. Return to the double-height sprite image and paste the mask at the top. Check to make sure everything is aligned correctly, then save this masked sprite to disk. The dragon looks like this with a proper image at the bottom surrounded by true black, and a mask at the top surrounded by true white:
Sprite Masking Program
The helpfile contains a program that creates a masked sprite automatically. It allows you to open an image and change it into a properly masked sprite. This takes the grunt work out of masking a sprite!Oops!
If you try to use the code to mask a sprite that contains black pixels in the image, the result contains errors. If you have a smiley face with black eyes and you attempt to mask it with the sprite masking code, the image produced looks like this: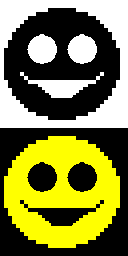
Uh oh! Do you see that the eyes and mouth are not masked correctly? If you use the sprite like this in a program, instead of having black eyes, the eyes will be transparent! This improper mask is produced because the mask program reads each pixel and when it encounters a black pixel, it changes it to white for the mask. It has no way of knowing which black pixels belong to the background and which are parts of the actual sprite image.
The incorrectly masked sprite looks like the image on the left when it is displayed in a program. It ought to look like the one on the right!

There are two ways to handle this problem. The easiest way is to mask the sprites using the sprite masking code, then edit the resulting image by hand to fill in the missing black pixels in the mask. The correctly masked smiley face looks like this:
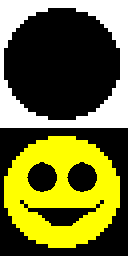
Another fix for the Oops.
If you want to use the sprite masking code, but you don't want to take the time to correct masks by hand, you must avoid using true black in the sprite image. You can use very dark gray, dark blue, etc.Here's a sprite man with black hair. The mask has been edited by hand so that the black hair is masked.

Here's a similar sprite man, but his hair is dark blue instead of black. The mask is automatically produced correctly by the sprite masking code, so it needn't be edited.
